


前几天也发布了汉化补丁,想着是时候分享一下这个项目仓库,给大家参考一下unity的旮旯给木是怎么动态替换文件以及制作共存补丁。 汉化补丁发布原贴:https://tieba.baidu.com/p/10439551885, 仓库地址:https://github.com/cokkeijigen/lostsmile_cn/,大家感兴趣的可以到仓库去看看源码()
本项目仅供学习交流使用,严禁一切商业或特殊用途!!! 
-
LOSTSMILE_CN:程序
hook相关,实现了资源重定向,可以与原版资源共存。 -
Assembly-CSharp:原版
Assembly-CSharp.dll反编译源码,修复存档路径、立绘显示等若干bug,以及添加自定义AssetBundle加载和资源替换(注:release分支为未修改过的源码)。
0x00 如何打包使用Unity打包Assetbundle
首先要知道游戏的unity版本,这个可以通过在游戏主程序.exe的属性或者UnityPlayer.dll属性中查看,再或者用ida打开UnityPlayer.dll查找字符串version或者UnityPlayer等字眼找到。
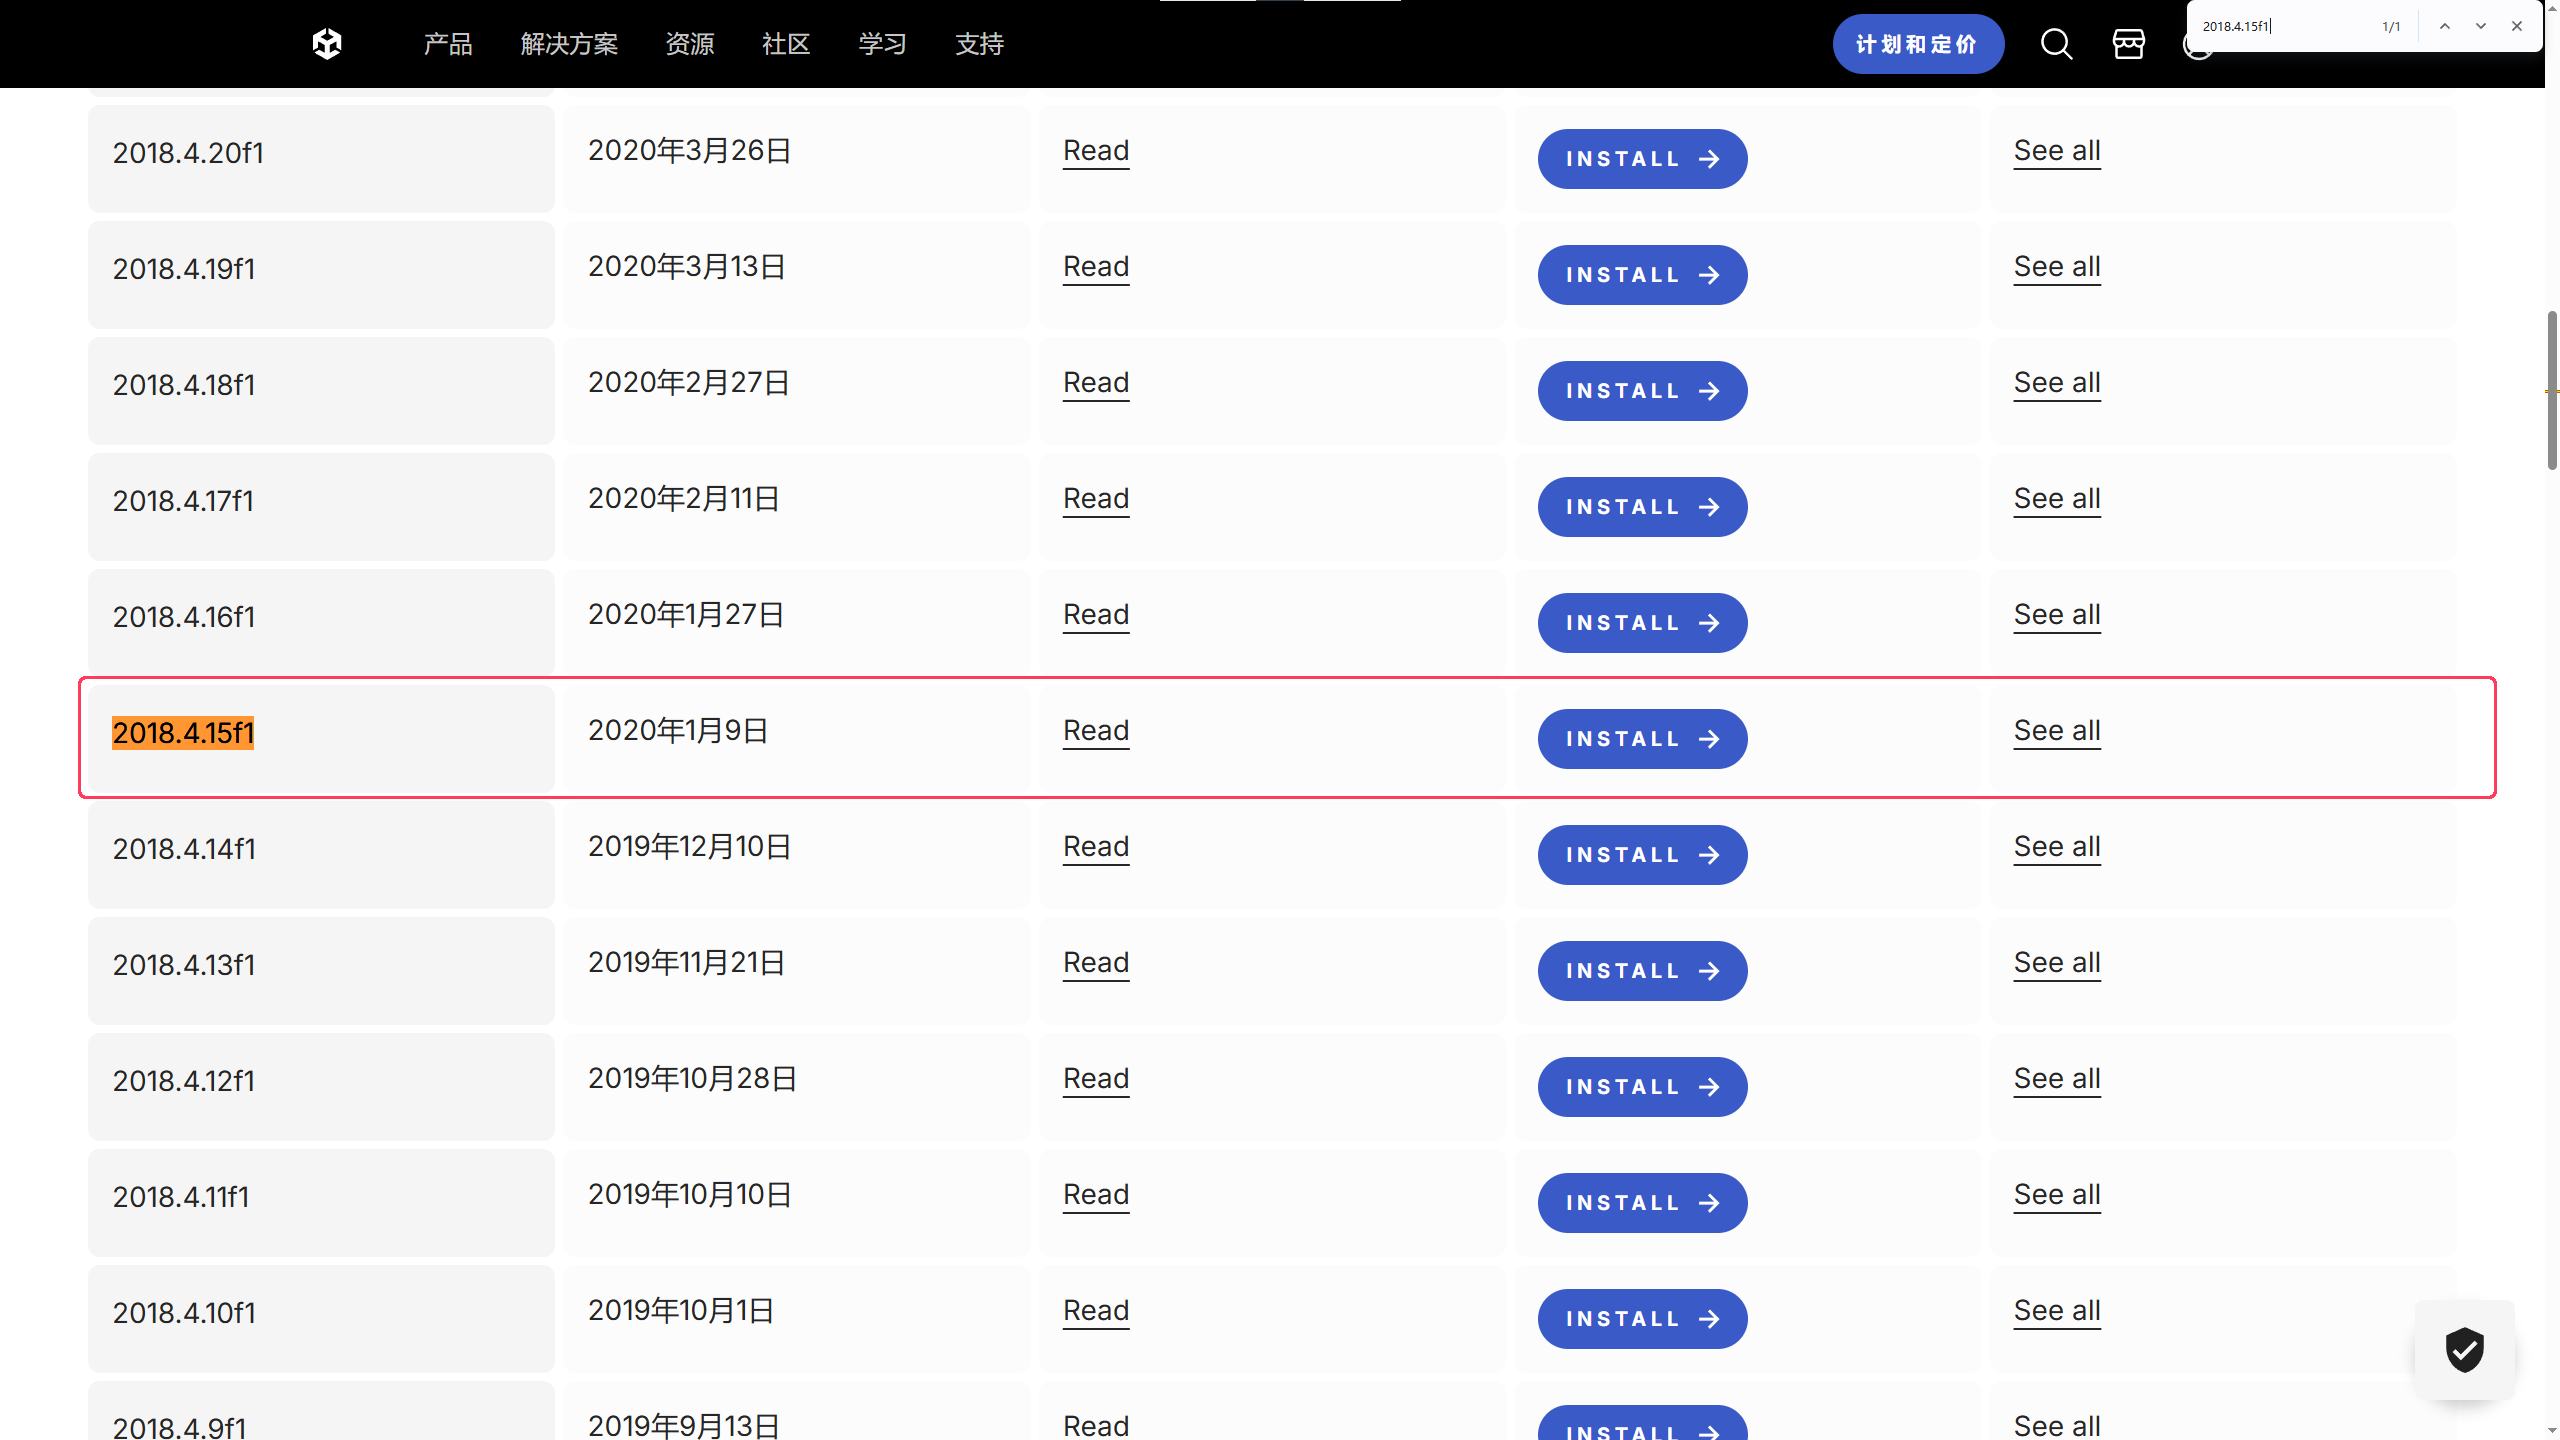
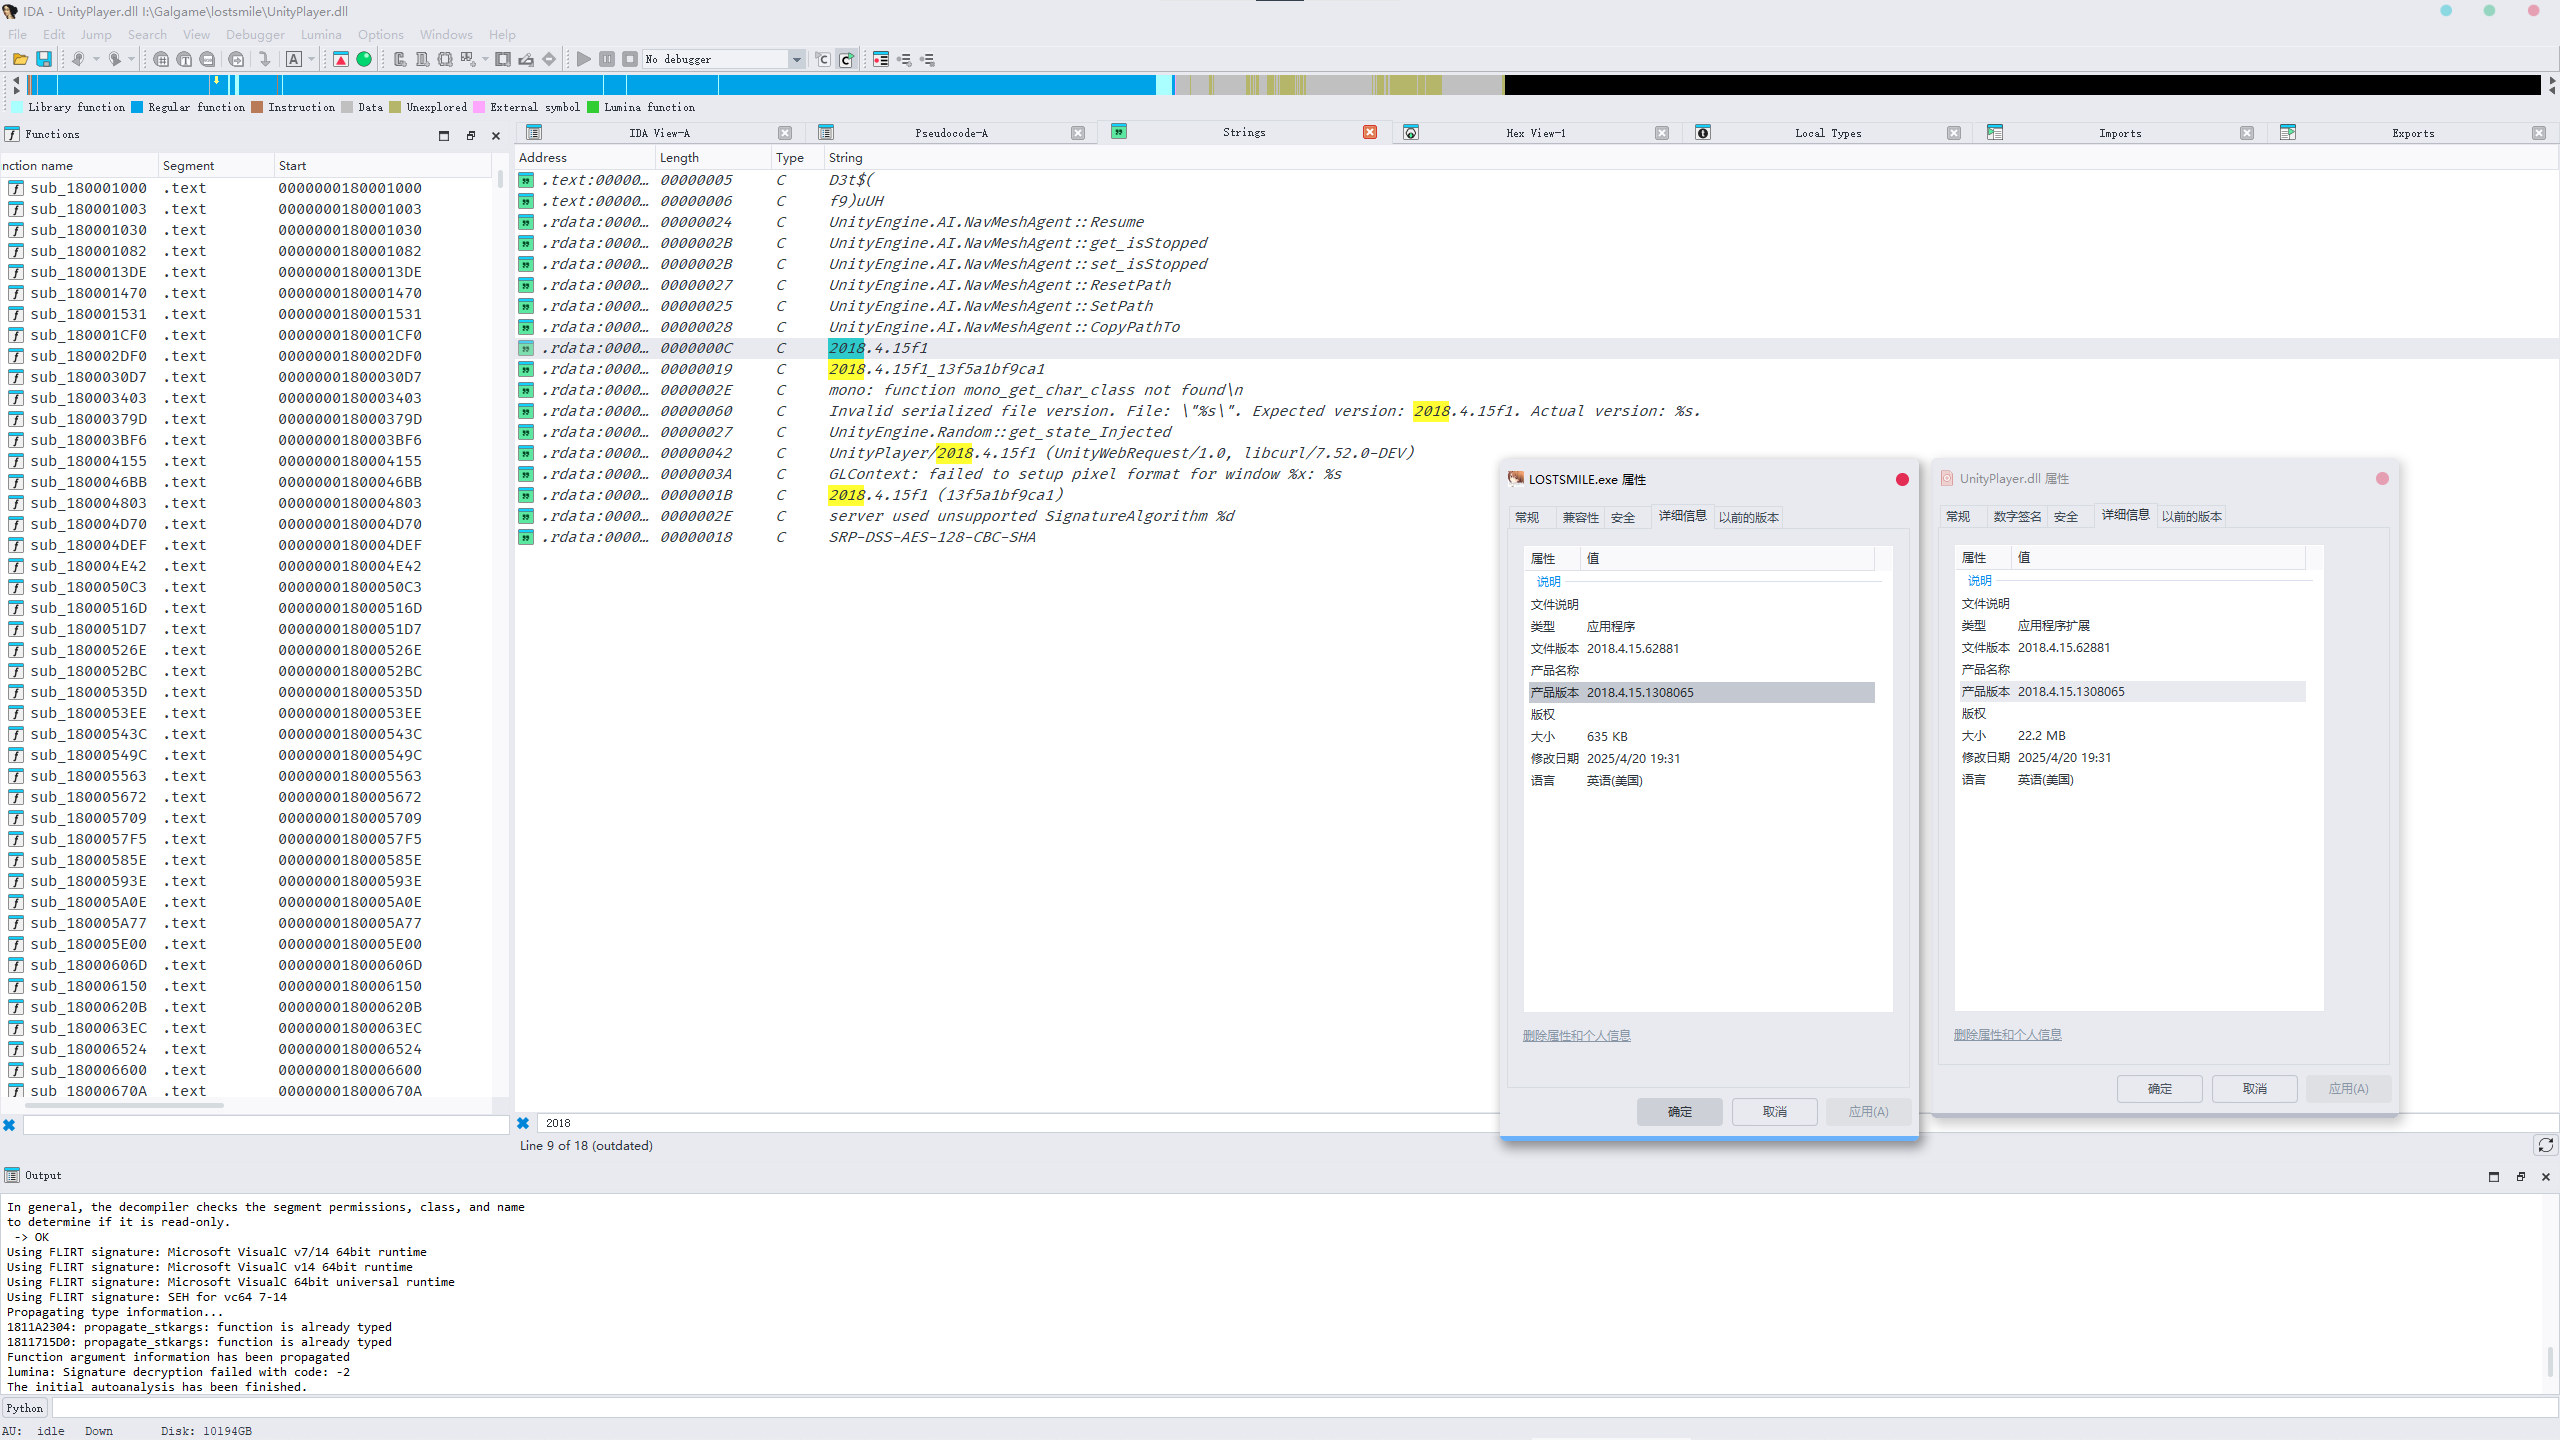 从UnityArchive中下载对应版本的Unity,这个游戏的版本为
2018.4.15f1,相信聪明的你,一定不用多说也知道怎么下载安装了吧()
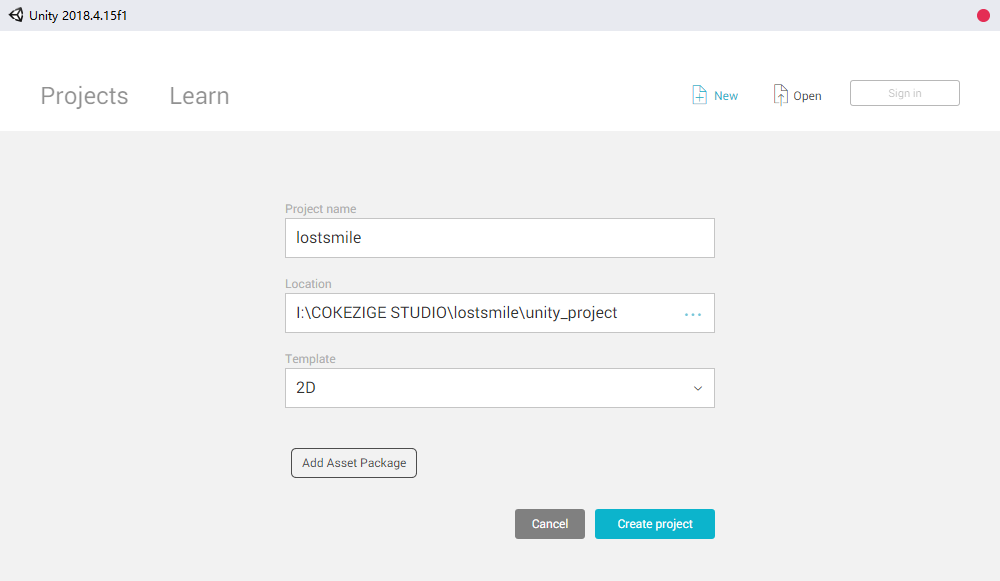
 接着随便新建一个项目,
Template随意,用默认的就行了。
 来到项目
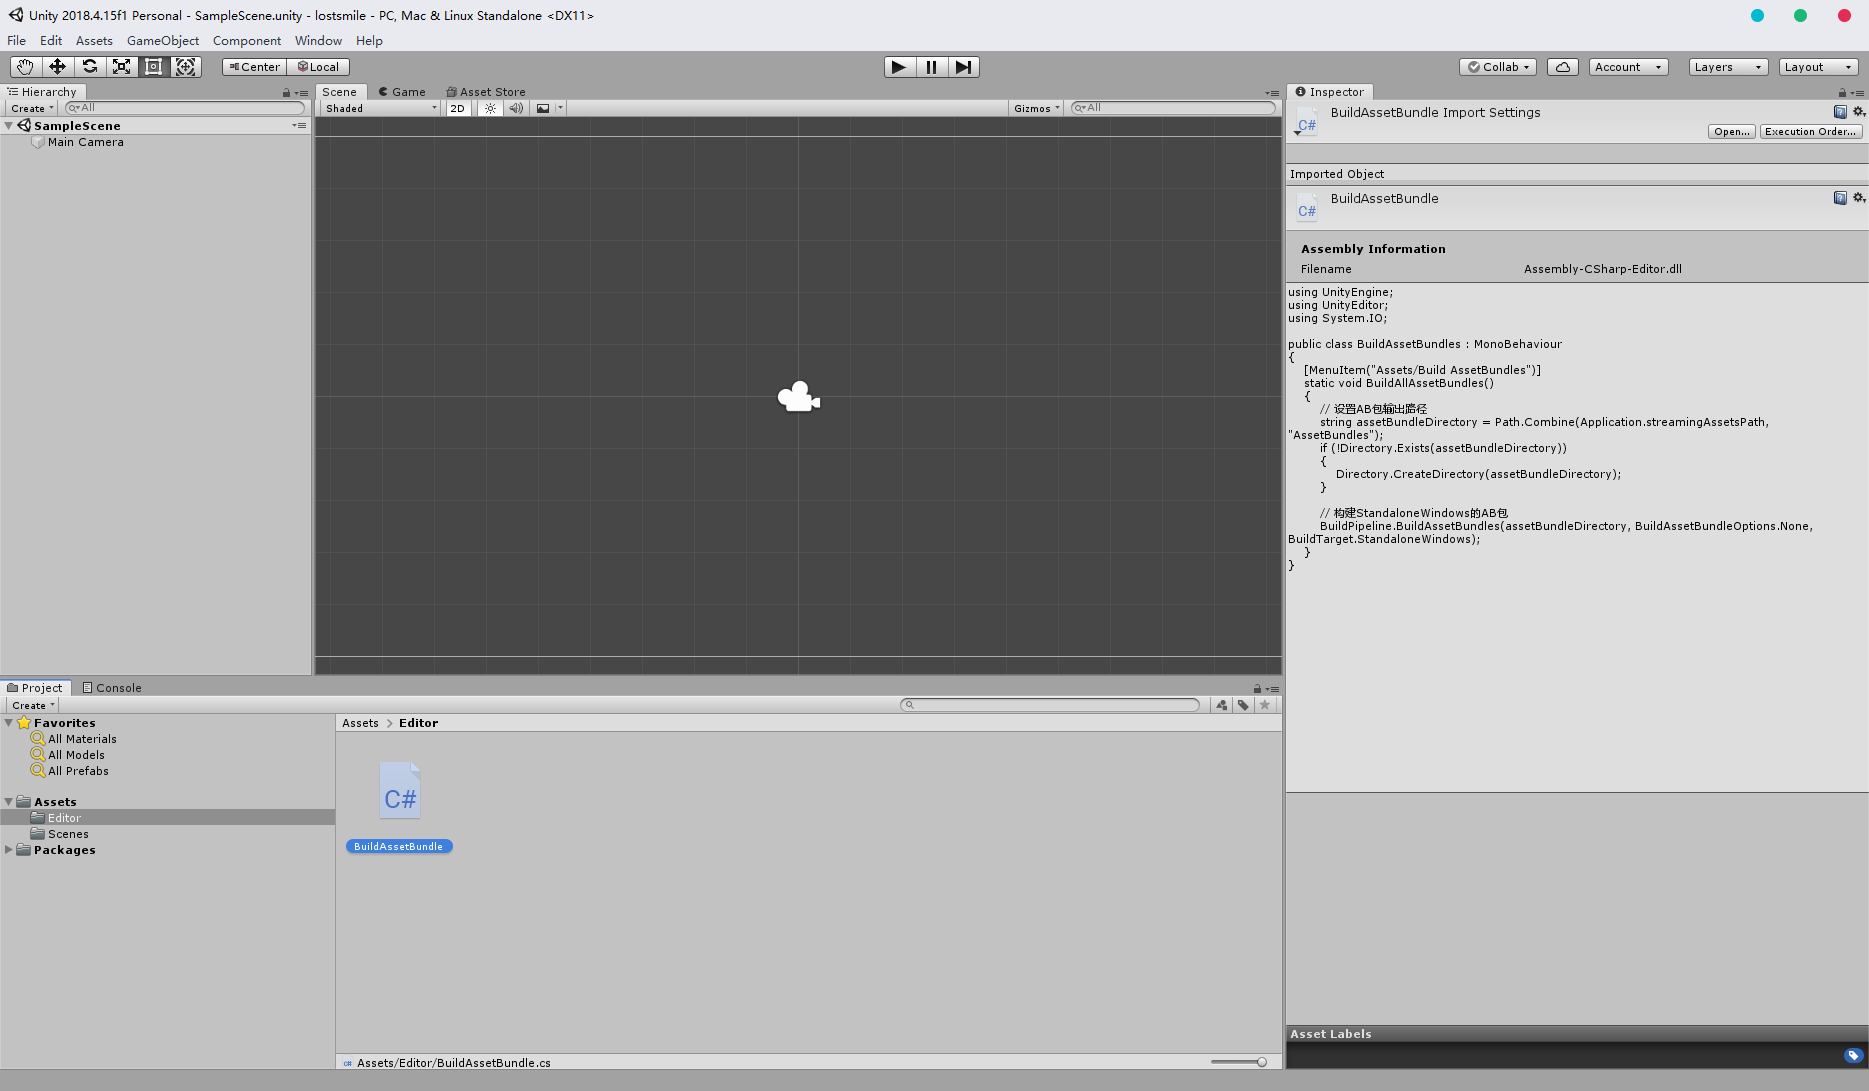
来到项目Assets目录下新建一个Editor的目录,进入里面接着创建一个C#脚本,名称随意,我这里叫BuildAssetBundle,内容如下:
using UnityEngine;
using UnityEditor;
using System.IO;

public class BuildAssetBundles : MonoBehaviour
{
    // 向Unity右键菜单添加一个选项
    [MenuItem("Assets/Build AssetBundles")]
    static void BuildAllAssetBundles()
    {
        // 设置AB包输出路径
        string assetBundleDirectory = Path.Combine(Application.streamingAssetsPath, "AssetBundles");
        if (!Directory.Exists(assetBundleDirectory))
        {
            Directory.CreateDirectory(assetBundleDirectory);
        }

        // 构建StandaloneWindows的AB包
        BuildPipeline.BuildAssetBundles(assetBundleDirectory, BuildAssetBundleOptions.None, BuildTarget.StandaloneWindows);
    }
}
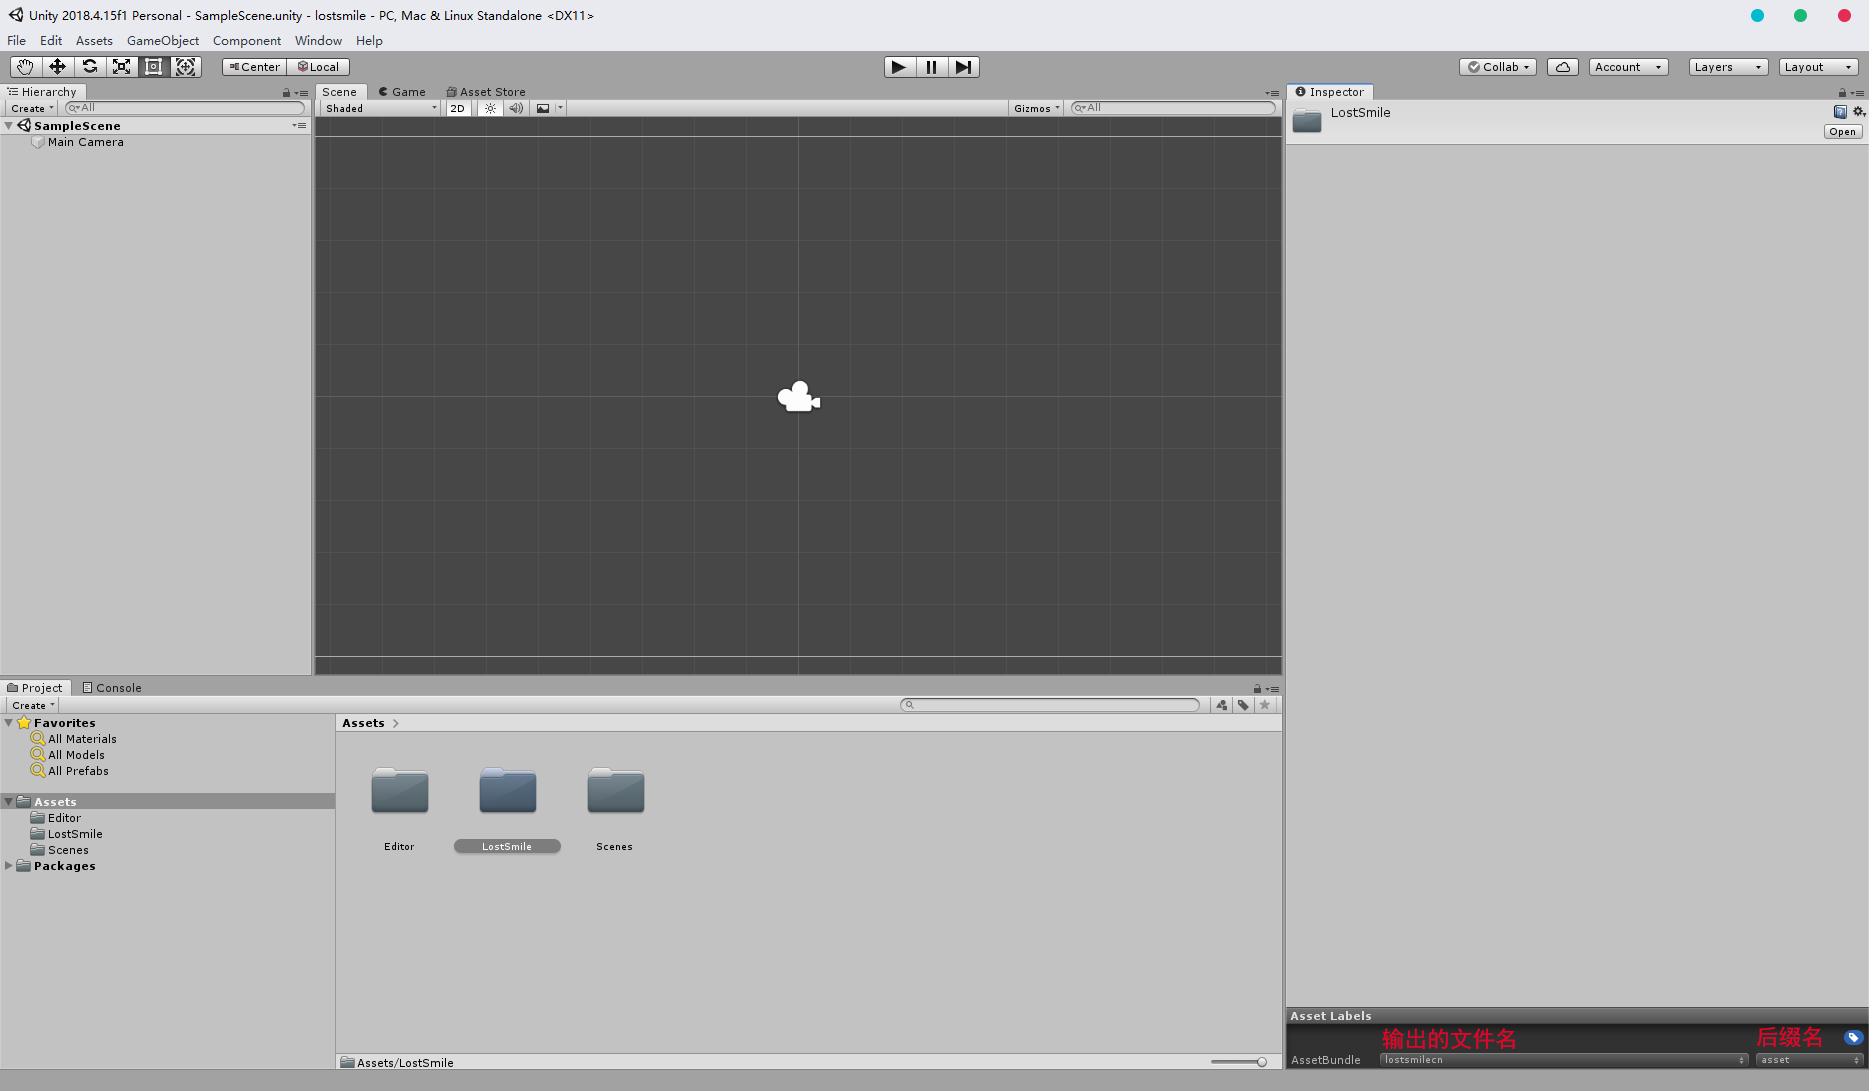
回到Assets,创建一个目录用于存档要打包的资源,名称也随意,我这里叫LostSmile,点击目录,可以看到右下角有个Asset Lables,没有可以新建一个,第一个是输出的文件名,第二个是后缀名。
 进入
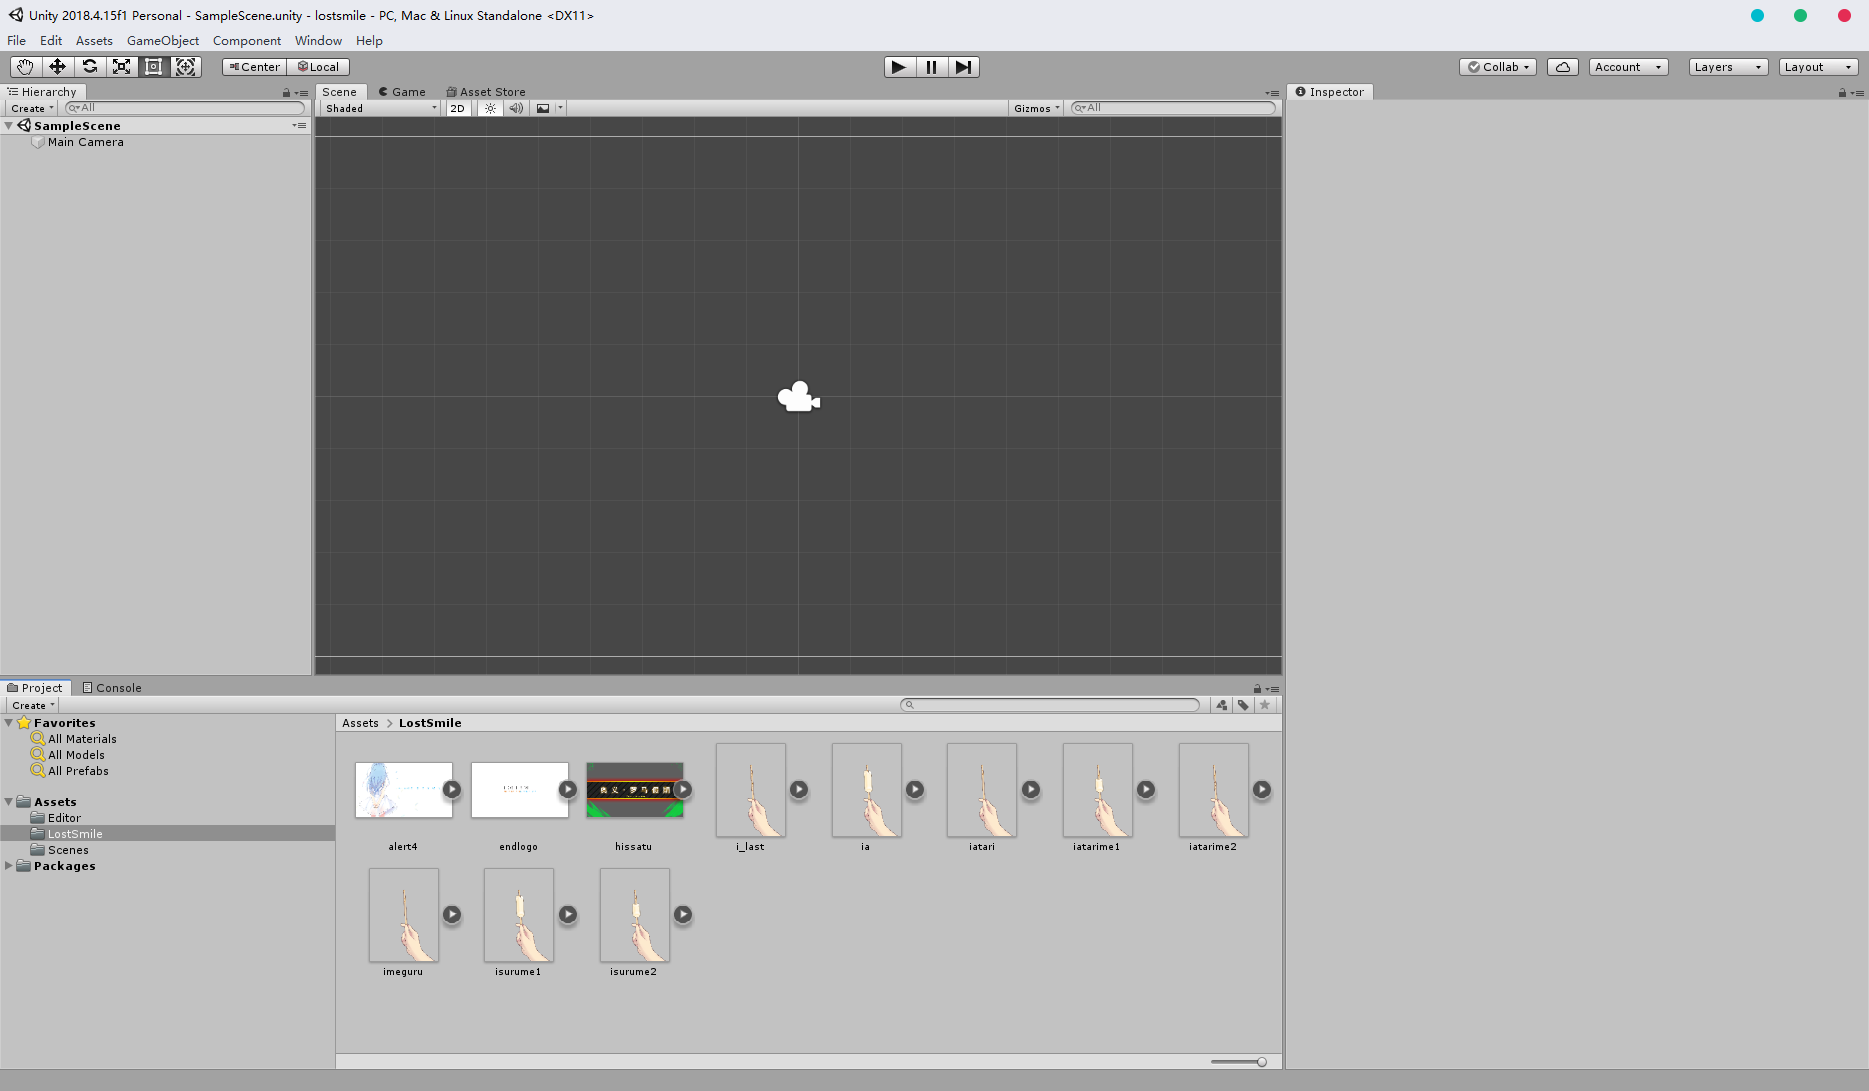
进入LostSmile,将要打包的资源放入。
 回到外面,在
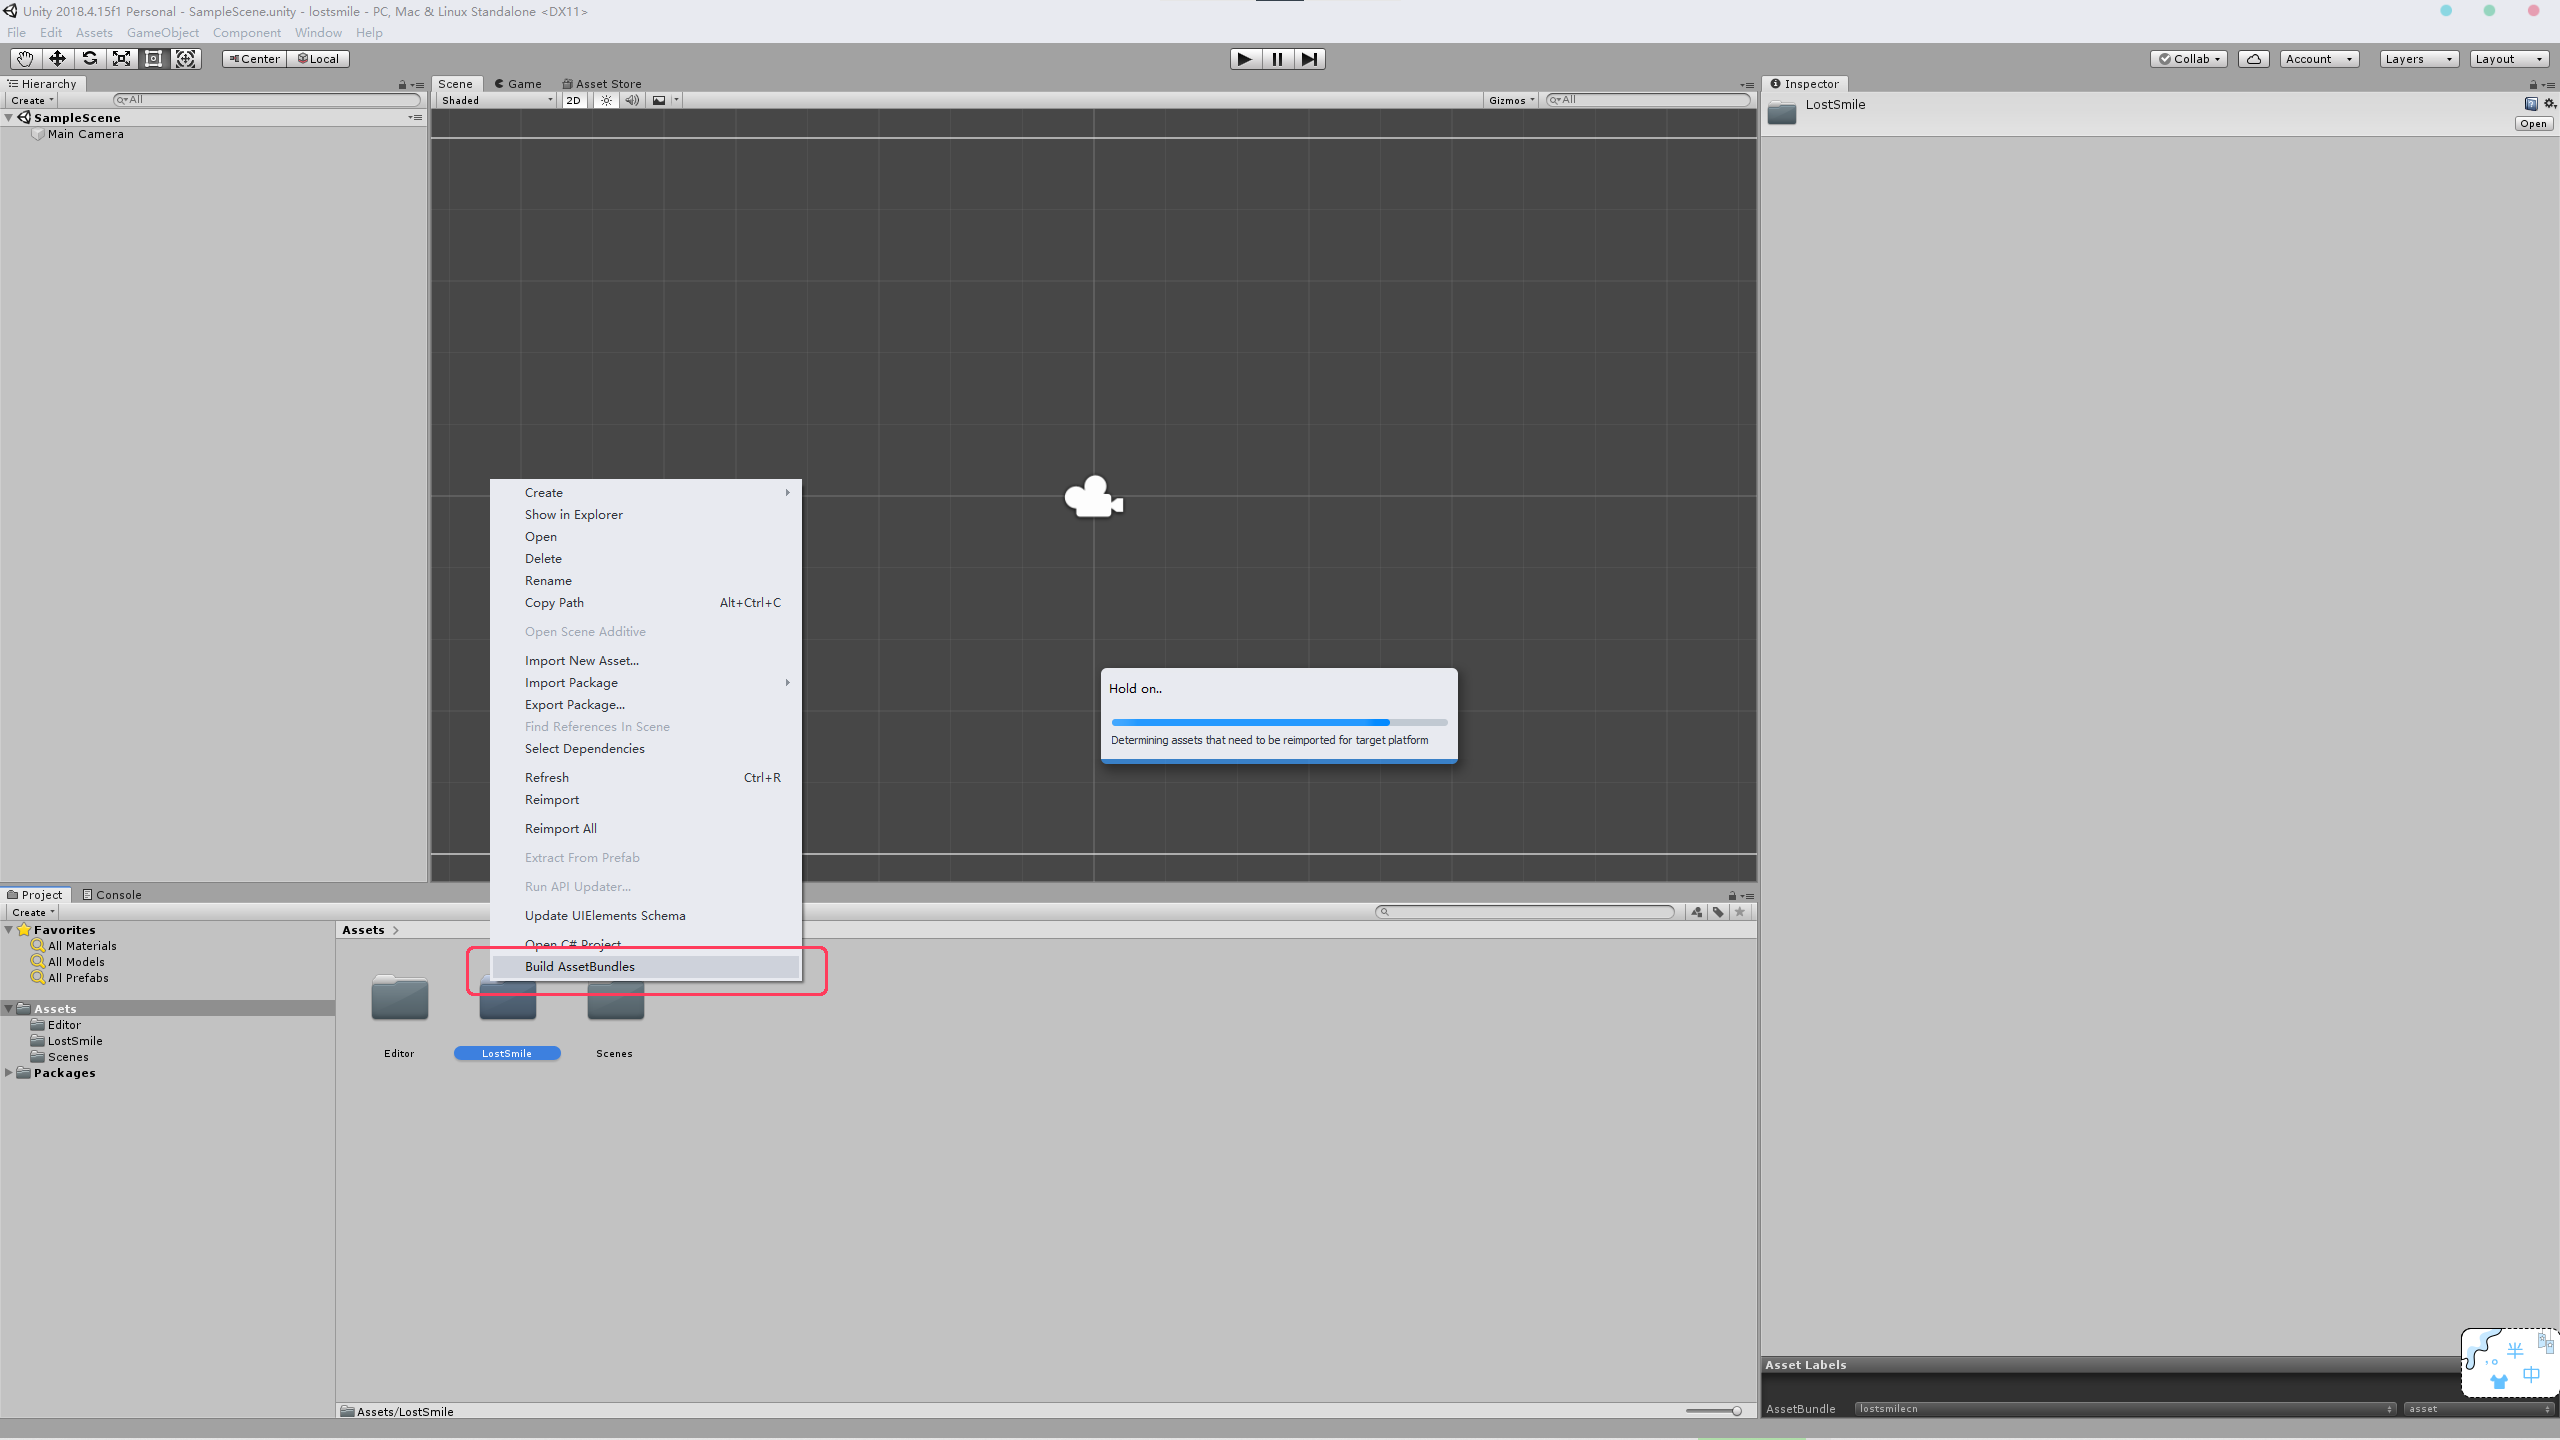
LostSmile右键Build AssetBundles即可。
 输出的
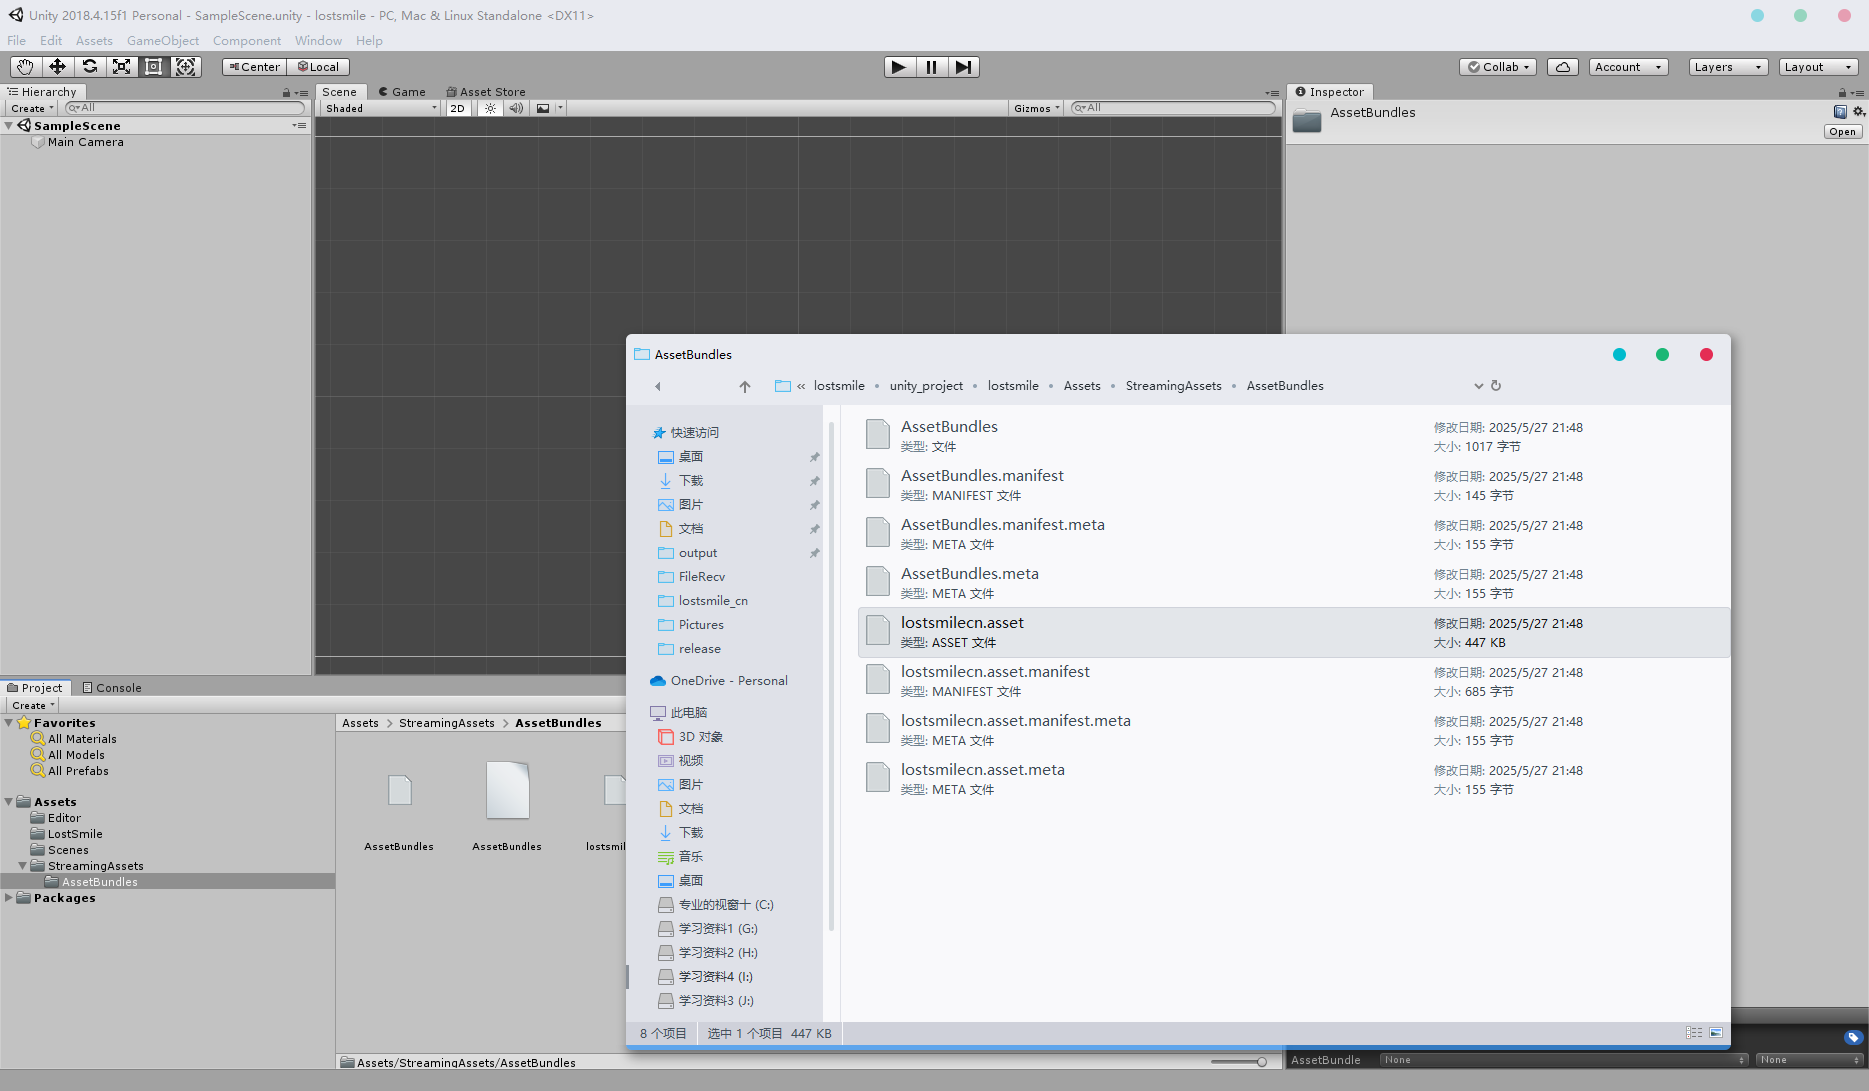
输出的AssetBundles就在项目目录下的Assets\StreamingAssets\AssetBundles。
0x01 加载自己打包的AssetBundles并替换
首先创建一个工具类,用来管理我们自己的AssetBundle:CHSPatch::AssetPatchManager。
public class AssetPatchManager
{

    private static readonly List<AssetBundle> AssetBundles = new List<AssetBundle>();

    static AssetPatchManager()
    {
        string cnBundlesDir = Directory.GetCurrentDirectory();
        cnBundlesDir = Path.Combine(cnBundlesDir, "LOSTSMILE_CN");
        if (Directory.Exists(cnBundlesDir))
        {
            foreach (string filePath in Directory.GetFiles(cnBundlesDir))
            {
                try
                {
                    if (filePath.EndsWith(".dll")) continue;
                    AssetBundle assetBundle = AssetBundle.LoadFromFile(filePath);
                    if (assetBundle == null) continue;
                    AssetBundles.Add(assetBundle);
                }
                catch (Exception e)
                {
                    Logger.OutMessage($"[ERRO] AssetPatchManager: {e.Message}");
                }
            }
        }
    }

    public static bool GetAssetIfExists(string fileName, out StaticAsset staticAsset)
    {
        staticAsset = null;
        //Logger.OutMessage($"查找文件:{fileName}");
        foreach (AssetBundle bundle in AssetBundles)
        {
            try
            {
                if (bundle.Contains(fileName))
                {
                    staticAsset = new StaticAsset
                    {
                        Asset = bundle.LoadAsset<UnityEngine.Object>(fileName)
                    };
                    Logger.OutMessage($"找到文件:{fileName}");
                    return staticAsset.Asset != null;
                }
            }
            catch (Exception e)
            {
                Logger.OutMessage($"[ERRO] AssetPatchManager::GetAssetIfExists: {e.Message}");
            }
        }
        return false;
    }
}
找到游戏获取AssetFile的地方插入自己写的方法调用代码,位置在: Utage::StaticAssetManager::FindAssetFile。
public AssetFileBase FindAssetFile(AssetFileManager mangager, AssetFileInfo fileInfo, IAssetFileSettingData settingData)
{

    if (Assets == null)
	{
		return null;
	}
	string assetName = FilePathUtil.GetFileNameWithoutExtension(fileInfo.FileName);
    // iTsukeziegn++
    StaticAsset staticAsset; // 尝试替换资源文件
    if (!AssetPatchManager.GetAssetIfExists(assetName.ToLower(), out staticAsset))
    {
        staticAsset = Assets.Find(x => x.Asset.name == assetName);
        if (staticAsset == null)
        {
            return null;
        }
    }
    // end
	return new StaticAssetFile(staticAsset, mangager, fileInfo, settingData);
}
0x02 修复存档中的绝对路径
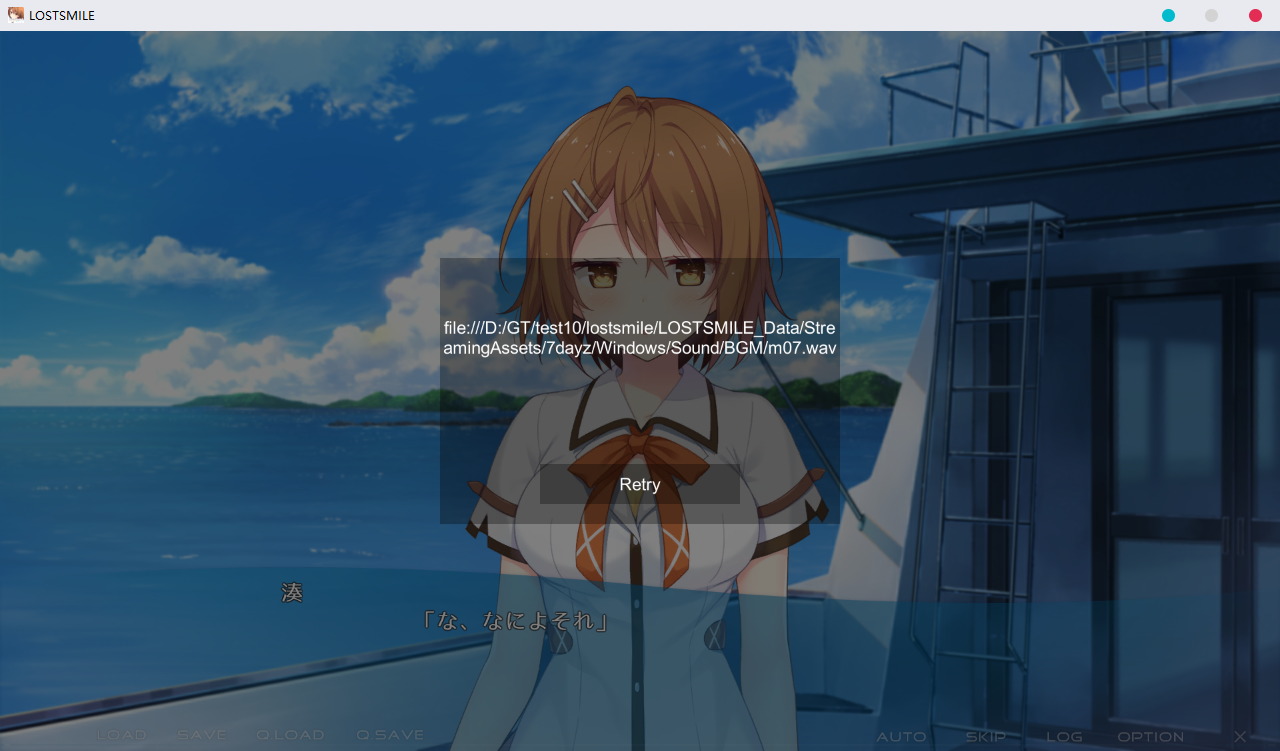 为了保证存档兼容原版,我这里选择了在获取
AssetFile的地方替换路径 (可能不是最佳位置,能跑就行),位置:Utage::AssetFileManager::GetFileCreateIfMissing。
private static string CurrentDir;

public static AssetFile GetFileCreateIfMissing(string path, IAssetFileSettingData settingData = null)
{
    if ((CurrentDir != null || (CurrentDir = Directory.GetCurrentDirectory().Replace("\\", "/")) != null) && !path.Contains(CurrentDir))
    {
        int index = path.LastIndexOf("/LOSTSMILE_Data");
        path = ((index != -1) ? ("file:///" + CurrentDir + path.Substring(index)) : path);
    }
    if (!IsEditorErrorCheck)
    {
        return GetInstance().AddSub(path, settingData);
    }
    if (path.Contains(" "))
    {
        Debug.LogWarning("[" + path + "] contains white space");
    }
    return null;
}
0x03 修复翻译角色名字后部分立绘不显示
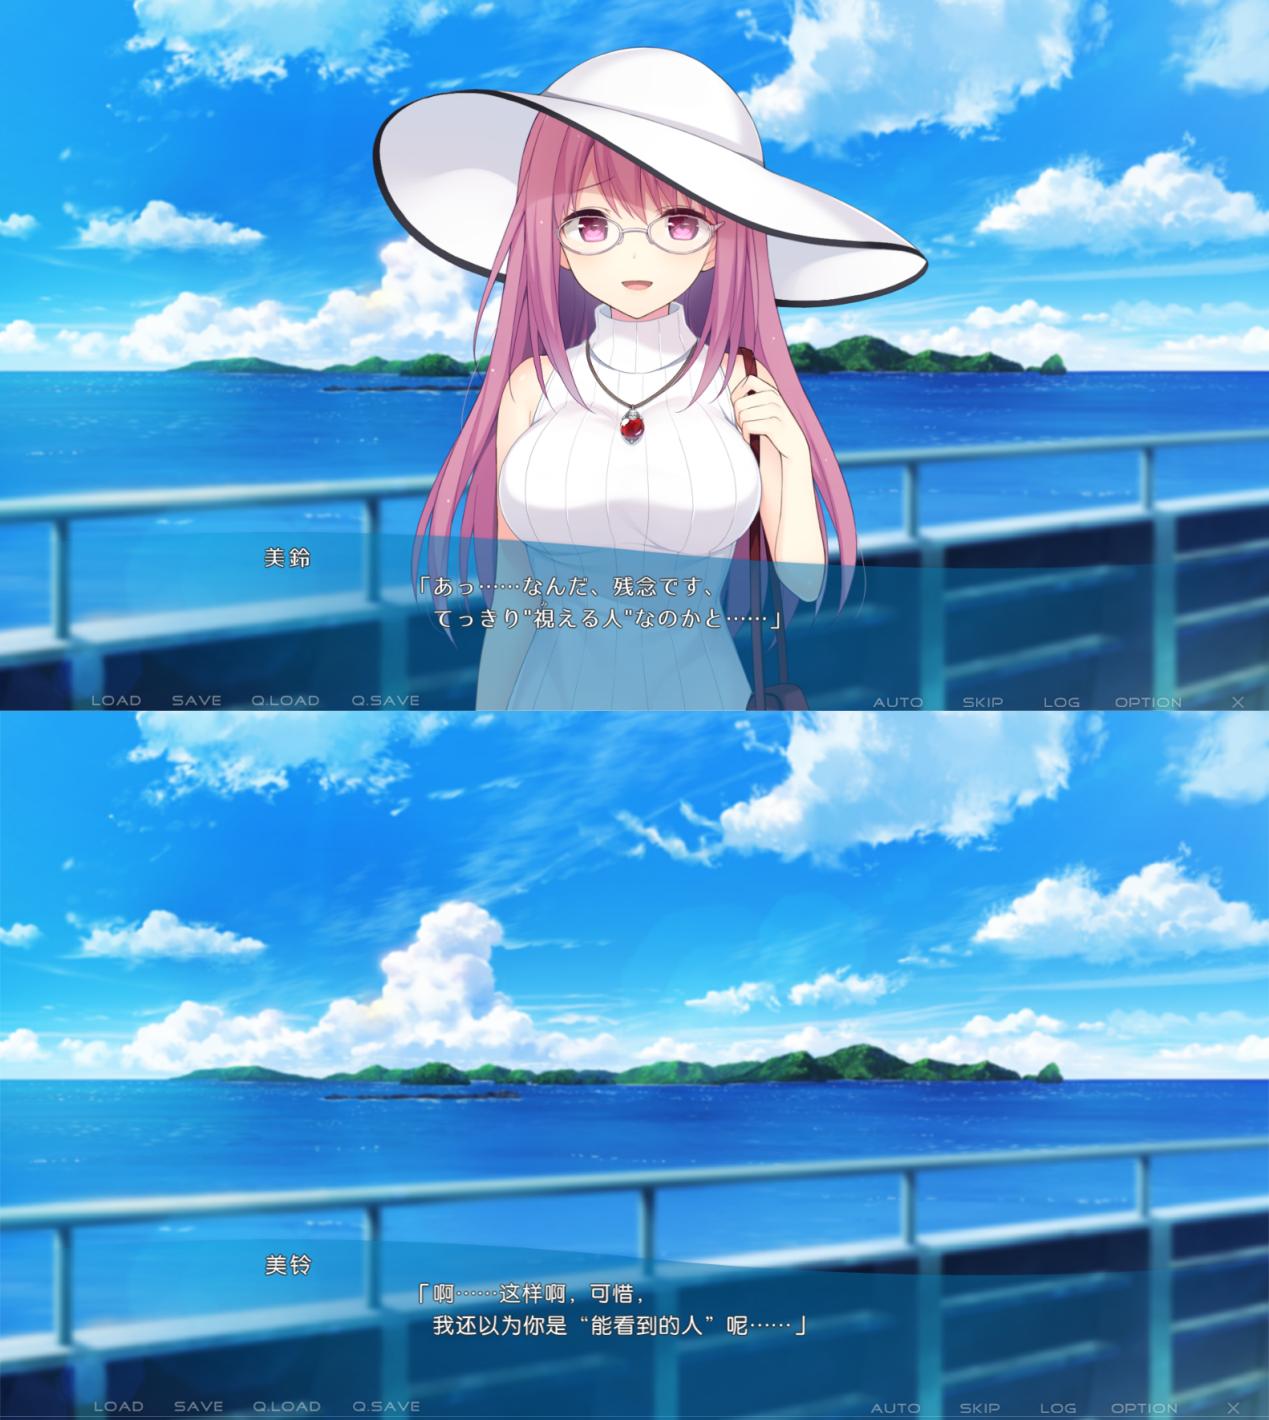 手动改的地方太多了,避免产生新的bug,因此这里采用动态替换,完整代码:Utage::AdvCharacterInfo。
public class AdvCharacterInfo
{
    public static AdvCharacterInfo Create(AdvCommand command, AdvSettingDataManager dataManager)
    {
        // ...其他代码

        // 对话角色名字文本
        string text = command.ParseCell<string>(AdvColumnName.Arg1);
        // 获取原文角色名字
        string characterLabel = GetRawCharacterName(text);

        // ...其他代码
    }

    private static string GetRawCharacterName(string text)
	{
		return text switch
		{
			"海洋之神" => "沖ツ御神",
			"棉花糖" => "わたあめ",
			"由希子" => "由希子",
			"美铃" => "美鈴",
			"春纪" => "春紀",
			// ...此处省略
			_ => text,
		};
	}
}
其他修改的地方可以到Assembly-CSharp搜索注释iTsukezigen++查看()
0x04 如何编译
Assembly-CSharp.dll(由ILSpy反编译生成的vs项目)
用vs打开项目,首先是补全依赖,编辑
Assembly-CSharp.csproj中的 "GamePath",替换成你的游戏安装路径。接着Ctrl + B编译即可。xml<PropertyGroup> <GamePath>I:\Galgame\lostsmile</GamePath> <AssemblyName>Assembly-CSharp</AssemblyName> <GenerateAssemblyInfo>False</GenerateAssemblyInfo> <TargetFramework>net4.7</TargetFramework> </PropertyGroup>
或者使用命令行
cmdcd Assembly-CSharp dotnet build .\Assembly-CSharp.sln -p:WarningLevel=0 --configuration Release
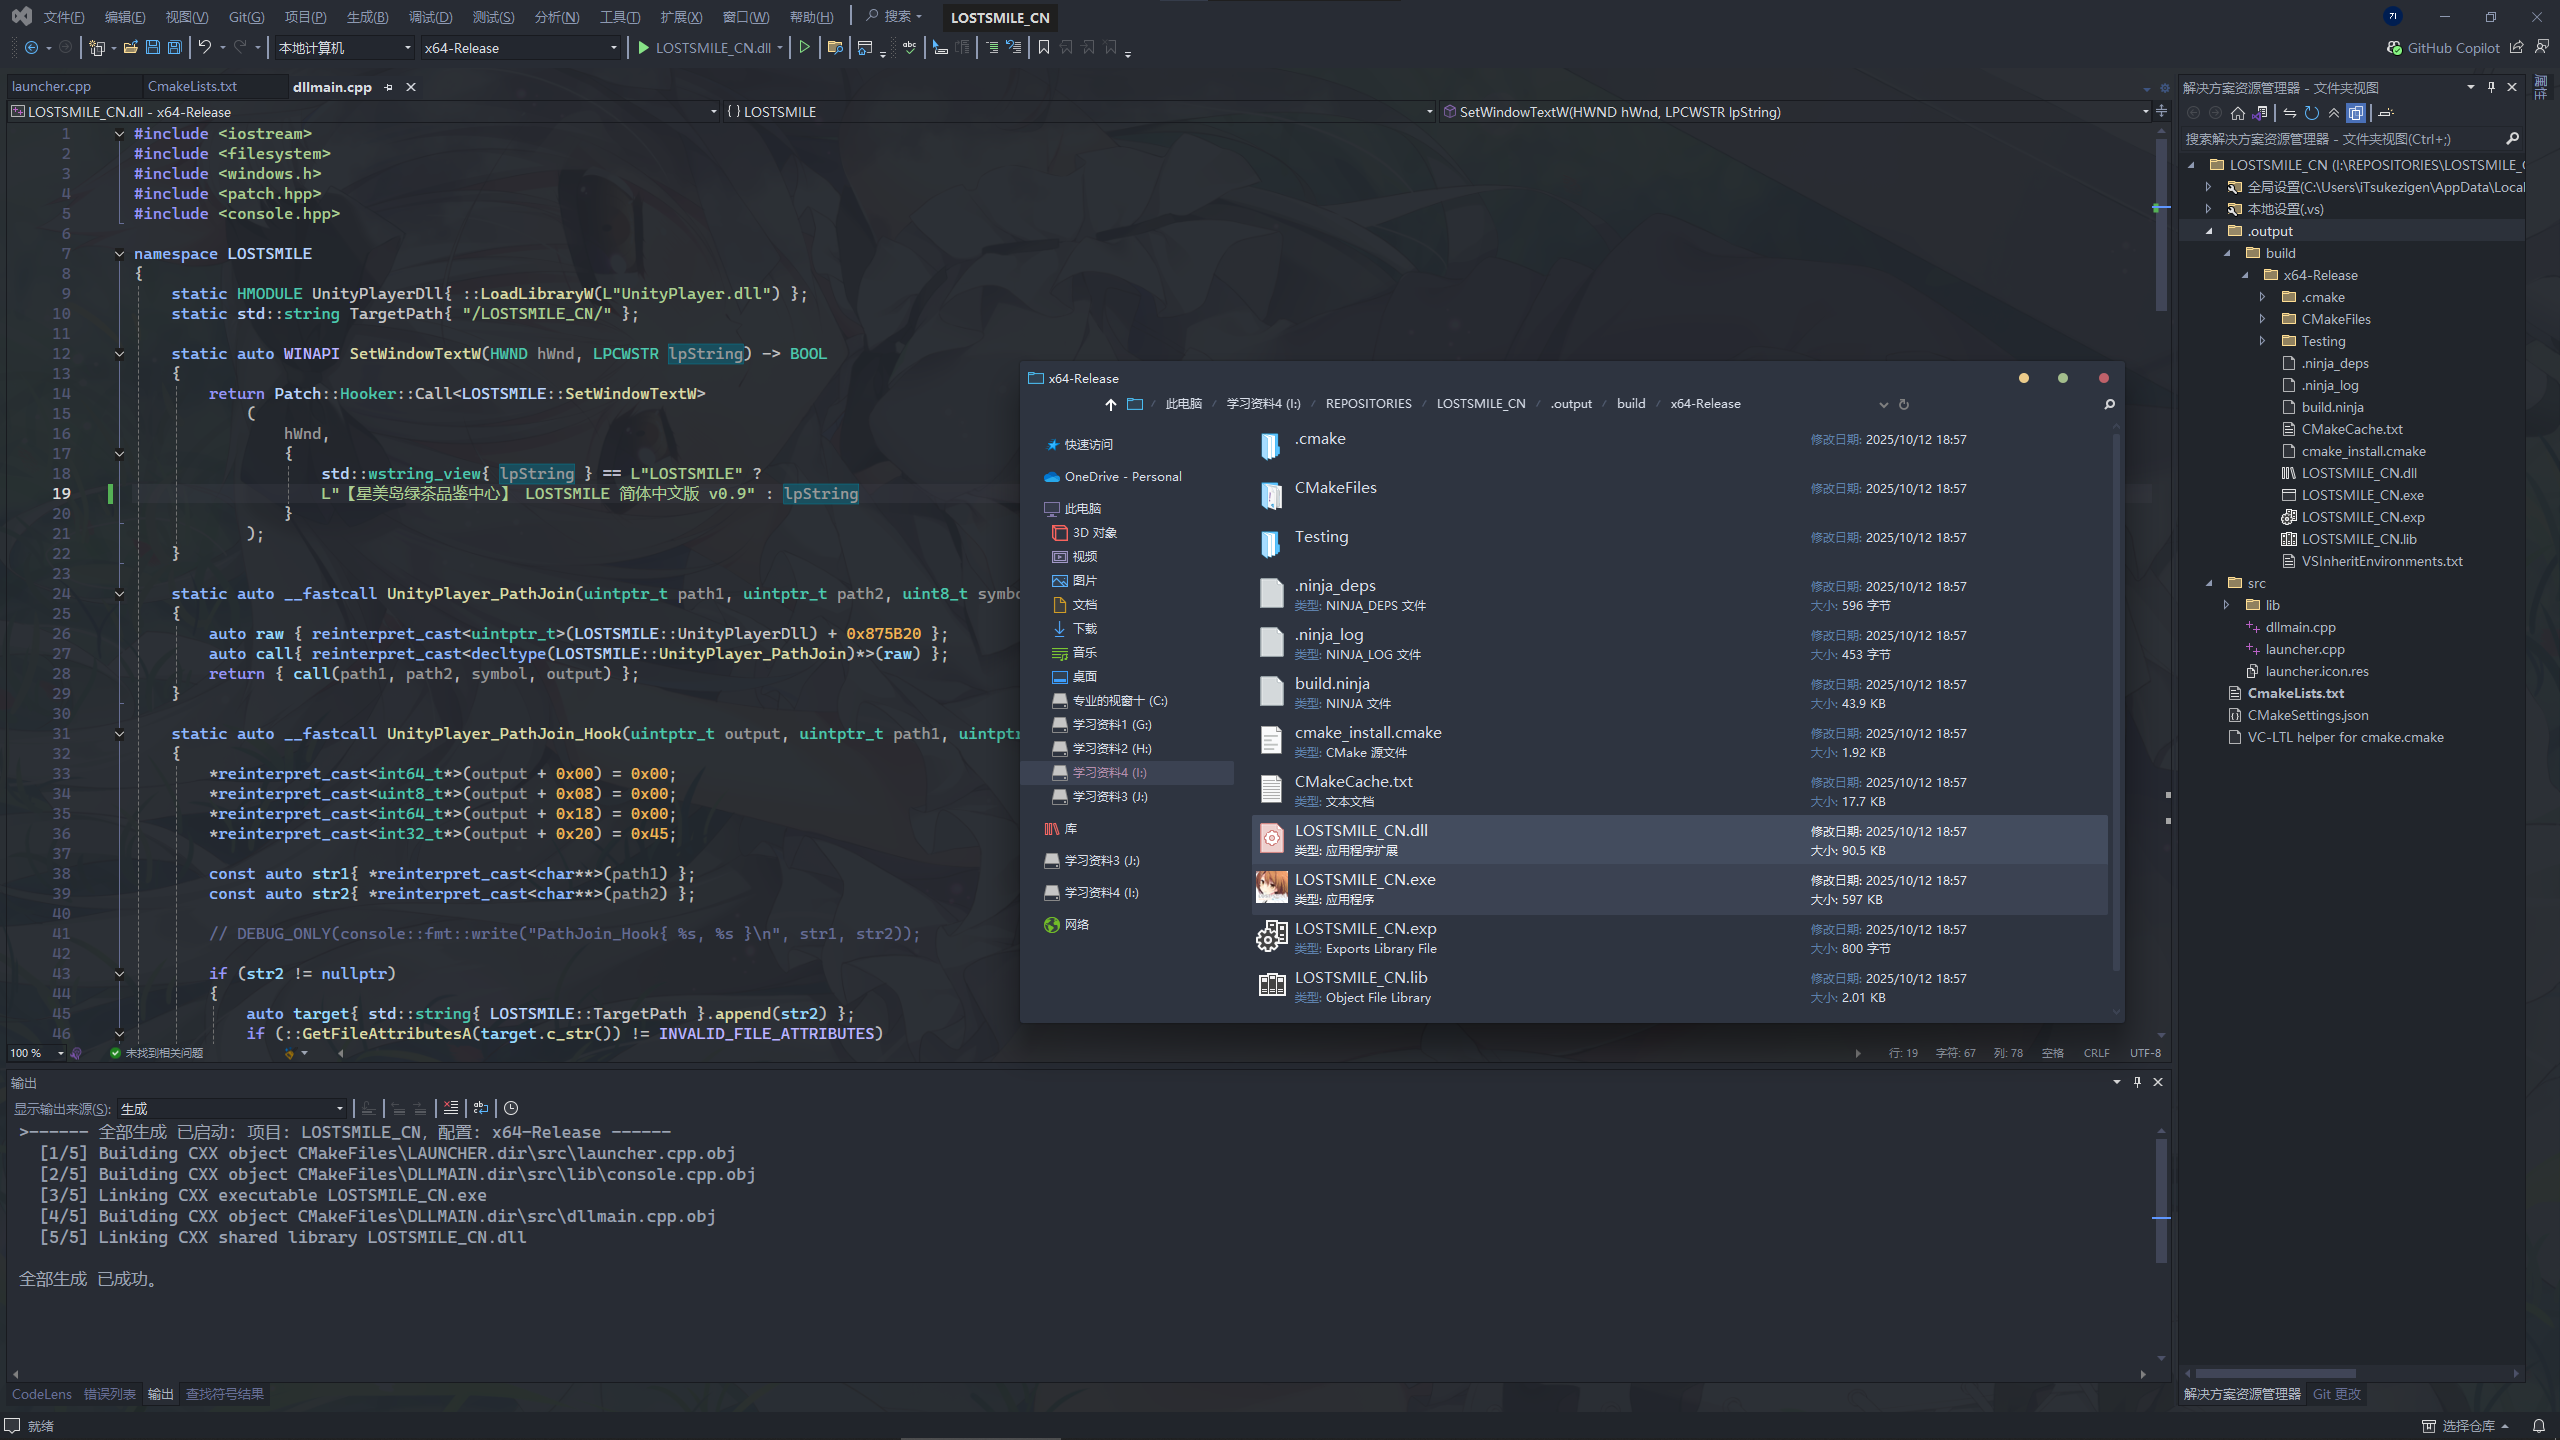
LOSTSMILE_CN.exe和LOSTSMILE_CN.dll
安装
VC-LTL5,可以不安装,但是编译出来的文件体积可能会有点大。vs打开等待cmake缓存完成,接着
Ctrl + B编译即可。或者直接运行build.bat。

1 条回复