Instructions
- This beautification guide is specifically for
Windows 10andWindows 11. The system used by the author isWindows 11 24H2 IoT Enterprise LTSC, and most tests were conducted on this system version. The methods mentioned in the guide are effective on this system; - The guide mainly focuses on achieving more acrylic effects in Windows. Other beautification effects are not extensively covered in this tutorial;
- The tools used in this guide primarily rely on open-source projects from Github. The implementation process can be somewhat complex. There are many all-in-one beautification toolboxes available online from various domestic authors, but some require login or are closed-source, which I find unacceptable.
Preparations
First, go to Windows settings, navigate to Personalization, and then to Colors. Find the transparency effects option and turn it on; otherwise, all acrylic effects will not be achieved.
![]()
Windows Right-Click Menu Acrylic Beautification
Method 1: AcrylicMenus
Project Link: https://github.com/krlvm/AcrylicMenus
Software Download: Click here to download
Instructions: After downloading, extract the files, navigate to the installer folder, and right-click on Install.cmd to run it as an administrator.
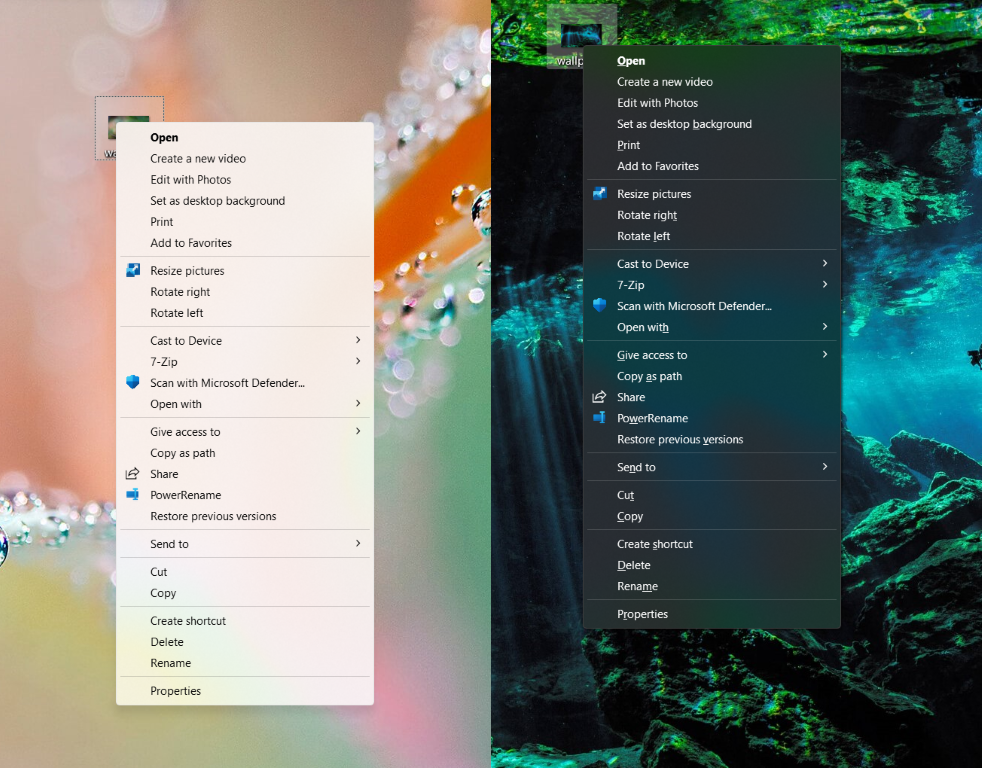
The effect achieved by this software is the built-in rendering effect introduced after Windows 11, with the color theme featuring a slight background acrylic rendering. Personally, I don’t find the effect particularly stunning.
Method 2: TranslucentFlyouts
Project Link: https://github.com/ALTaleX531/TranslucentFlyouts
Software Download: Click here to download
Instructions:
-
After downloading the compressed file, extract it to the
C:\Program Filesdirectory. Navigate to theTranslucentFlyouts.Win32.V3.x64folder, right-click oninstall_win32.bat, and run it as an administrator. The software will then automatically configure itself, requiring a good external network connection (VPN) to connect to Microsoft servers. -
After installation, press
Win+S, search for the registry editor, and open it. In the registry address bar, enterHKEY_CURRENT_USER\SOFTWARE\TranslucentFlyouts\and press Enter. Right-click to create a newDWORDvalue namedEffectType, and set the value data to4to achieve an acrylic right-click menu. You can change the registry value for different effects:None: 0
Full Transparency: 1
Solid Color: 2
Blur: 3
Acrylic: 4
Modern Acrylic: 5 (default)
Acrylic Background Layer: 6
Mica Background Layer: 7
Mica Variant Background Layer: 8 -
For more detailed instructions, refer to the official documentation: https://github.com/ALTaleX531/TranslucentFlyouts/blob/master/ReadMe/zh-cn.md
-
This method can mostly achieve global right-click acrylic effects in Windows, though some in-app right-click menus, such as those within Chrome, will not have acrylic effects and will remain as the app's default appearance.

Windows File Explorer Acrylic Beautification
ExplorerBlurMica
Project Link: https://github.com/Maplespe/ExplorerBlurMica
Software Download: Click here to download
Instructions: After extraction, navigate to the Release folder and right-click on register.cmd to run it as an administrator. This will restart the explorer, cause a brief black screen, and then return to normal, implementing the acrylic effect in File Explorer.
Windows Start Menu Acrylic Beautification
TranslucentSM
Project Link: https://github.com/rounk-ctrl/TranslucentSM
Software Download: Click here to download
Instructions: After downloading and extracting, double-click start.exe to launch it. It's recommended to create a shortcut for this program, then press Windows Key + R, type shell:startup, and click OK to open the startup folder. Cut and paste the shortcut into this folder, so the acrylic effect is applied automatically upon startup.
Important Note: For the Windows 11 24H2 version, do not update the latest Microsoft patch 2024 Cumulative Update for Windows 11 Version 24H2 for x64-based Systems (KB5040529) as it will render this software ineffective.

Windows Taskbar Acrylic Beautification
TranslucentTB
Project Link: https://github.com/TranslucentTB/TranslucentTB
Software Download:
- Search for TranslucentTB in the Microsoft Store
- Click here to go to the Microsoft Store installation page
- Download from the Github release page
Instructions: After installation from the Microsoft Store, locate the software icon in the system tray and select the acrylic effect.
Windows Window Title Bar Acrylic Beautification
MicaForEveryone
Project Link: https://github.com/MicaForEveryone/MicaForEveryone
Software Download:
Instructions:
-
This software runs on
.NET Core. Some Windows versions may not automatically redirect to download and install .NET Core when launchingMicaForEveryone.exefor the first time. In this case, you need to manually install .NET Core. Click here to install.NET Core, select the x64 version for Windows. -
It is recommended to enable startup at boot for this software.
-
After launching the software, go to the default regulation settings, select the style settings, and choose Acrylic as the blur type. This software also allows customization of window corners (straight or rounded). However, enabling the advanced settings
Extend window frame into client areaandBlur BehindonWindows 11 24H2may cause a font rendering bug, making it difficult to read text, so it is not recommended to enable them.
Windows PowerShell Background Acrylic Beautification
oh my posh + Windows Terminal
Project Links:
Software Downloads:
-
Microsoft Store installation:
Click here to go to the Microsoft Store installation page:
-
Github release page download:
Instructions:
After installing the two software packages above, open Windows PowerShell. Use the shortcut Ctrl + , to open the settings, then click the bottom right corner to open the JSON file. Add the following configuration code after "profiles"::
"defaults":
        {
            "opacity": 50,
            "useAcrylic": true
        },
This will achieve the acrylic effect.
If you want to set the title bar to an acrylic effect as well, press Ctrl + , to enter Settings -> Appearance -> Use acrylic material in tab row, enable it, and then restart PowerShell. Note that the default acrylic transparency for the title bar is 50 (refer to the official Microsoft documentation).
If you want to achieve more effects in PowerShell, such
as a transparent Mica background, you can refer to this blog post: Click here to view.
